Today we're back on the patternmaking train. Last time, we traced pieces from the printed magazine sheet, and added 5/8" seam allowances. Now we just need to draft the skirt and pocket pieces.
Wait, pockets? Yep. As you may have observed, the original pattern doesn't include pockets. The magazine shows you how to add a curved embellishment on the skirt that is supposed to look like a pocket. But what a cruel joke that is, right? We demand real pockets! Today, we'll create a pattern piece for the skirt, and draft a simple interior patch pocket.
 |
| Pockets! Everybody needs 'em. |
Looking at the original BurdaStyle image, this dress has a gathered skirt that's basically a rectangle. On the printed sheet, there is no pattern piece to trace; just instructions to cut a rectangle with specific dimensions. You absolutely could do this. But because I'm adding pockets, I need an actual pattern piece. So let's get to it!
Find measurements for the skirt rectangle
The BurdaStyle pattern specifies different dimensions, depending on the pattern size. So, first you'll need to determine which numbers you need.Find the key: Go back to the grey box in the instructions (page 98 of the printed magazine), showing all provided sizes. Note where your size appears: is it the first size listed? second? last?
 |
| The famous grey box: workhorse of your BurdaStyle magazine pattern. Source: photo of printed BurdaStyle US magazine |
Next, go the the "Cutting out" section of the instructions. Look at the instructions for piece "a." There are five options, which correspond with pattern size, in increasing order. For example, I chose size 116 (6X in US sizes), so I'm looking for the third number in each sequence (19 1/4" by 19" long).
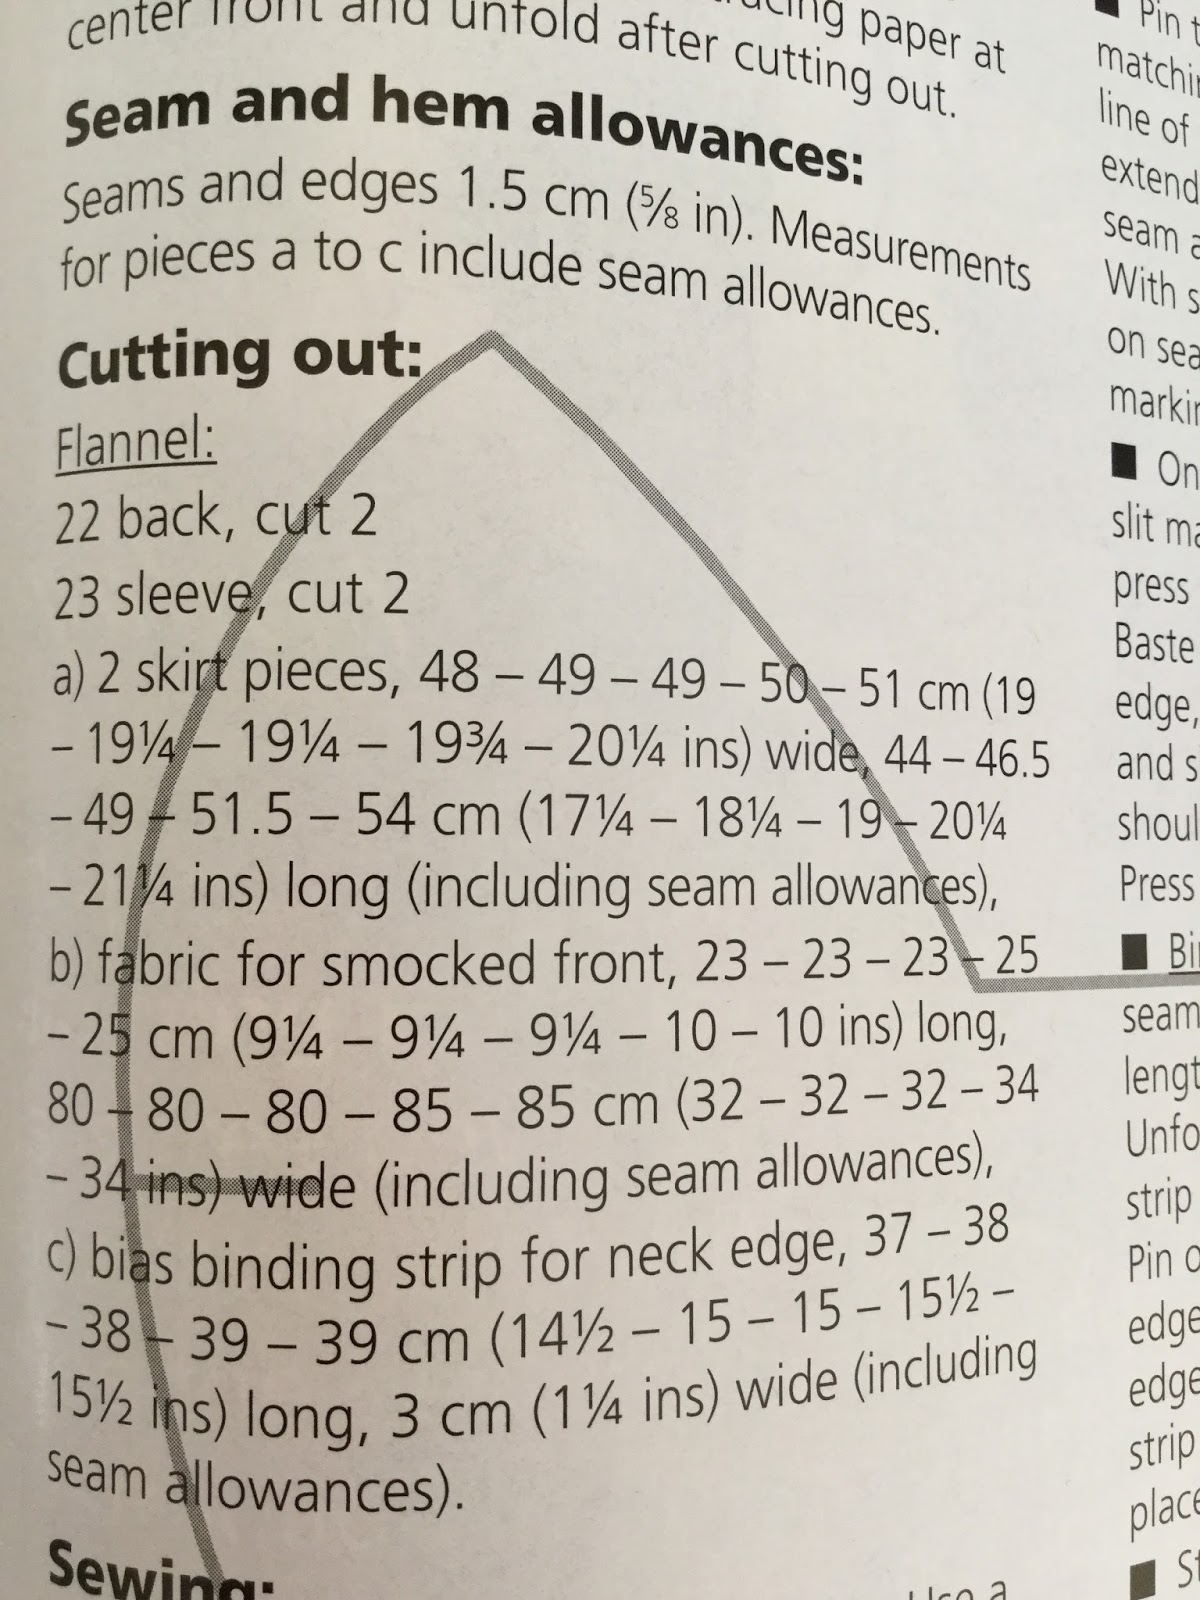 |
| Dimensions for your skirt rectangle. Source: photo of printed BurdaStyle US magazine |
And look! It says "including seam allowances." But what are the seam allowances? Cast your gaze above, to the "Seam and hem allowances" section. It says 5/8". These are built in to the dimensions.
Draft the skirt and pocket openings
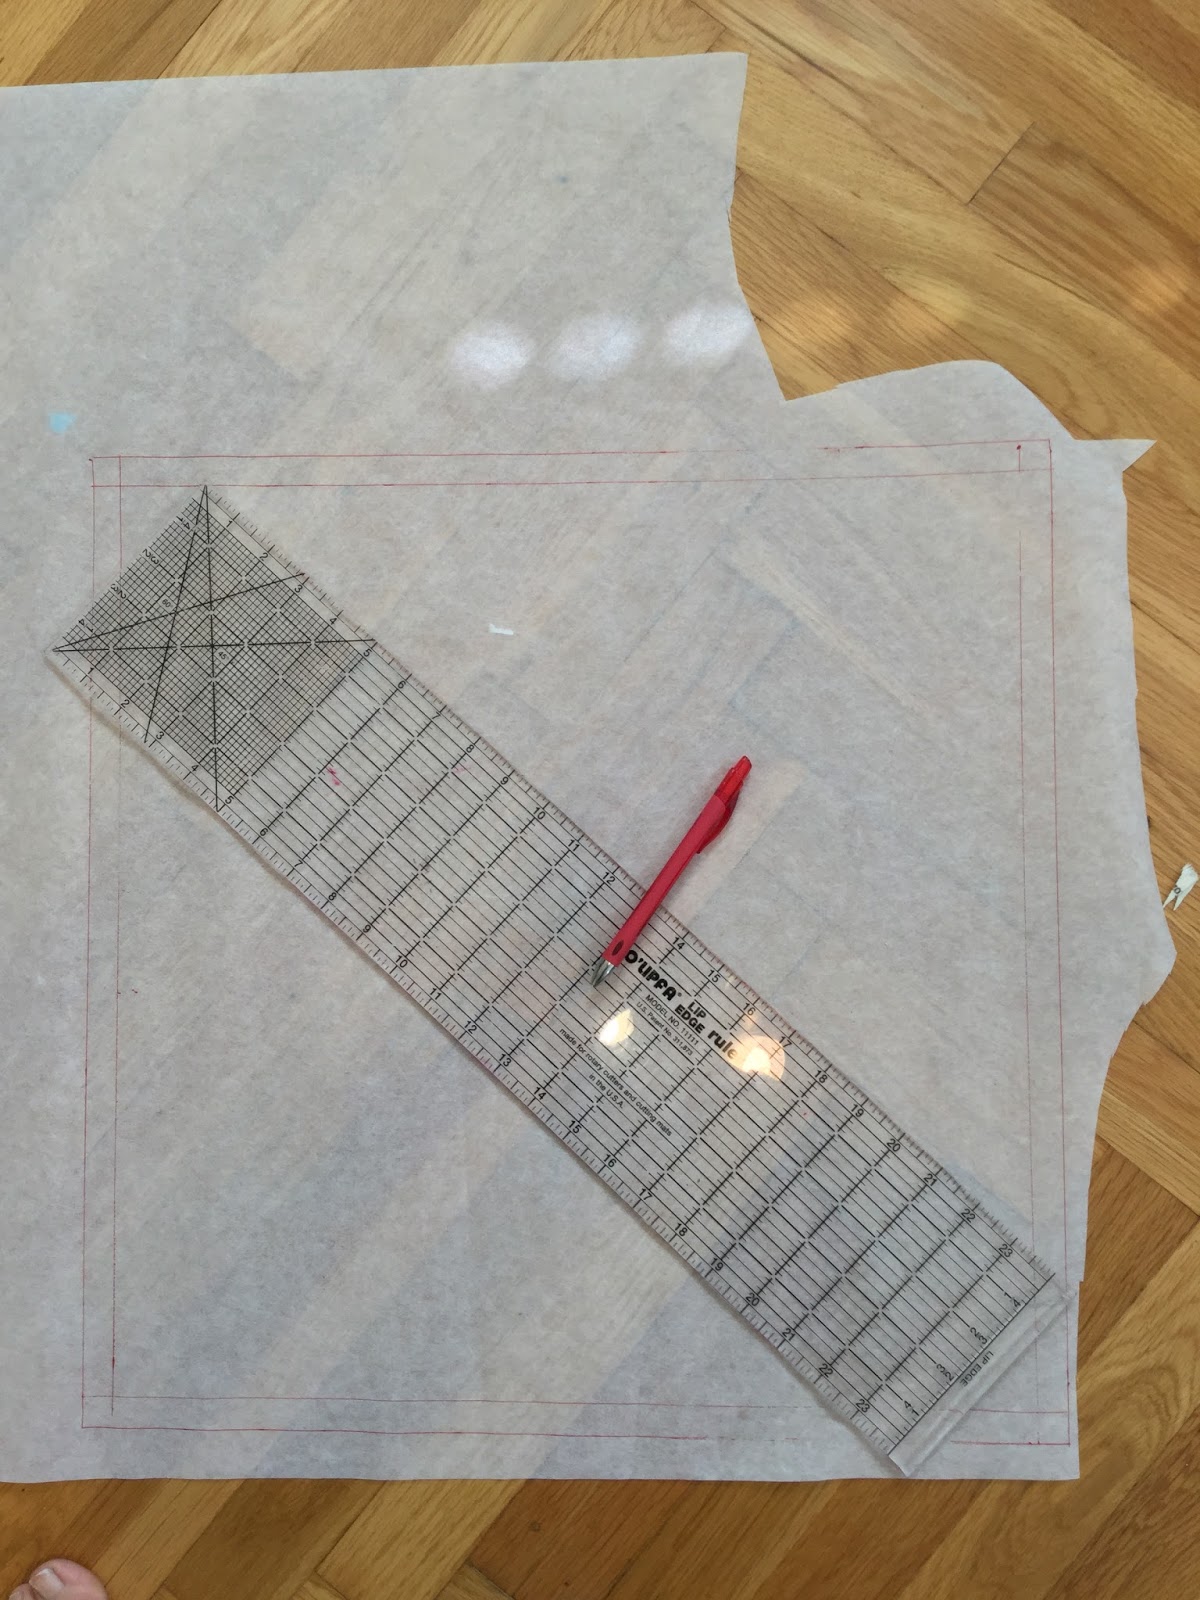
Draw the skirt rectangle: Using a ruler, draw the rectangle on your tracing paper. Then, measure 5/8" in from each side, and draw the sewing lines. Why? Because pocket drafting is next, that's why.
 |
| And here, my dirty secret is exposed: I am also a quilter. |
Mark the ends of the pockets: At the top left of the skirt, make two marks: 2 3/8" from the left, and 5" from the top. Make these marks in relation to the seam line (not the cutting line)
 |
| Drafting, yo |
Make a swoop: How are you at freehanding? Yeah? Good? Okay, then you will be comfortable drawing a curved line from one mark to the other. No shame in using a French curve here, if needed.
 |
| The degree and location of the swoop are up to you. This one hews closely to the BurdaStyle magazine version, with the curve toward the bottom. But do your own thang! Make it straight if you want, or swoop differently. |
Perforate 5/8" seam allowance from the swoop: You just marked the sewing line of the swoop. Now add a 5/8" seam allowance, using the threadless sewing machine method we used last time. You're a pro.
 |
| Sew the perforation all the way to the cutting line. |
Cut the pattern piece: Just as before, cut along the perforations for the pocket, and along the rectangle cutting lines.
We've cut out a pocket on one side; now for the other side. Fold the pattern piece exactly in half, vertically along the center front. Using the cut-out pocket as a guide, chop the same piece out of the other side.

Label the skirt piece: The original BurdaStyle instructions tell you to cut two identical rectangles from the fashion fabric. One for front, one for back. But with the addition of pockets on the front, the pieces aren't identical any more. As you can guess, we'll cut one piece of the fabric with the pocket curves, and one plain rectangle, using the pattern piece as a general guide. So, I recommend adding a note on the pattern piece that says something like, "Cut 1 with pockets, and 1 as a rectangle without pockets." Do not trust your future self to simply remember this important information. Can you imagine slicing into a double layer of your fashion fabric, blissfully cutting out the pocket curves from bothlayers, and realizing too late what you've done? Nooooooo!
Draft the pocket backing
The pocket backing goes underneath the curved cutout you just drafted. Again, you don't absolutely need to make a pattern piece for this, because it's just a rectangle. But I like to have a pattern piece for everything; it lets me easily visualize the cutting layout, and immediately know if there's enough fabric for the job.Make a rectangle: My rectangle is 6 3/4" wide by 9 1/2" long. It's a freeform thing. Make yours any size you like. Just ensure it's big enough for an adult hand to fit into, so you can clear out the pocket before washing the dress (e.g. crayons).
 |
| The pocket piece, fully labeled with the usual info. |
You did it!
That's it! Now that you've drafted a simple interior patch pocket, we're ready to put away the pattern pieces for a while.Join me next time, when we create the beautiful smocking effect that's the star of this show.
So what do you think? Was this a new challenge, or an easy breeze? Any questions about drafting this type of pocket? Ask me in the comments!
What is an interior patch pocket
ReplyDeleteHa ha. Great question! It's something I couldn't find an official name for. It's like a regular patch pocket, but instead of being on the outside of the garment, it's on the inside. And instead of accessing it like a regular patch pocket (with the entire top being open), it is accessed through the curve described in this post.
DeleteIt's like a "curved inset pocket" (http://textileapex.blogspot.com/2014/11/different-pocket-types.html) but instead of having a separate "bag" that is attached from the opening, it uses a single "patch" that's sewn down to the front of the garment.
This is not helping, is it?
Does anybody know what this kind of pocket is called?